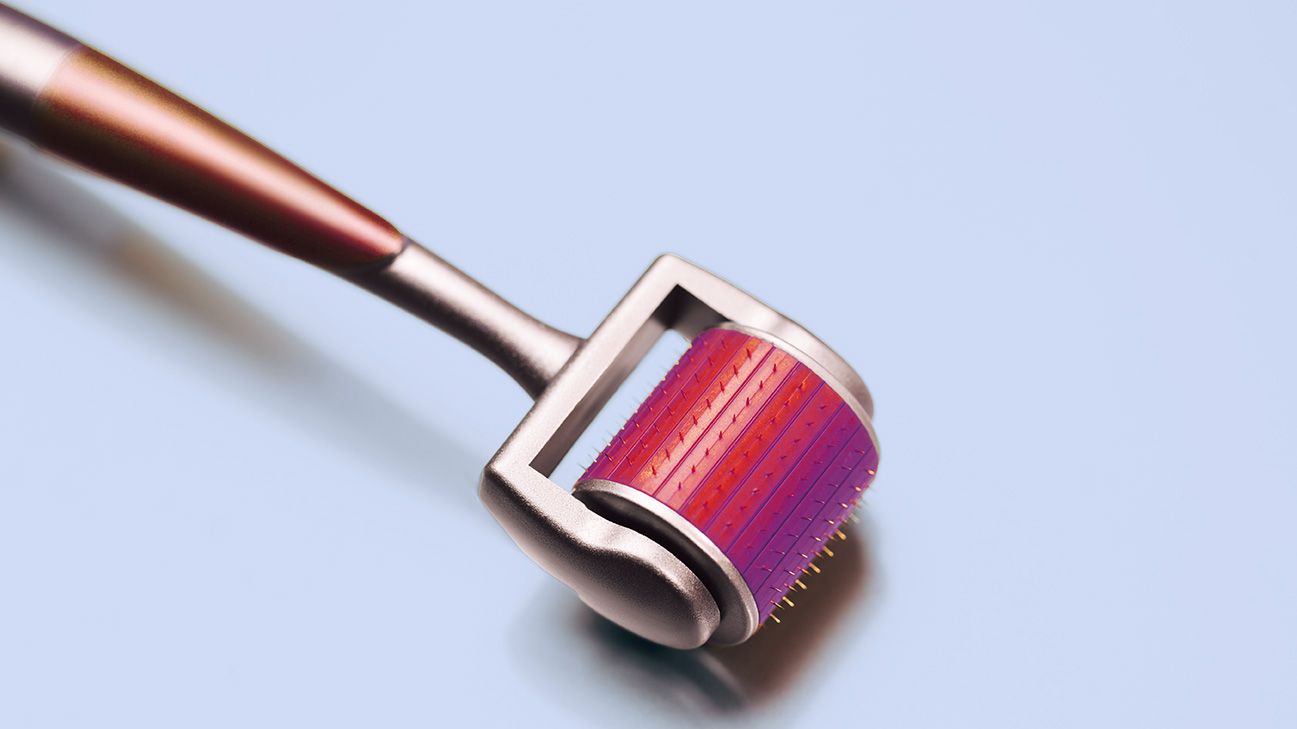
Microneedling, also known as dermarolling, is a method that uses tiny needles to puncture the skin. It’s believed to thicken the skin, diminish fine lines and wrinkles, and lessen hyperpigmentation.
Now, you don’t need to visit a dermatologist for microneedling. You can easily buy a dermaroller online at a much lower cost. But, is using a spiky device at home safe and effective?
Here’s what to know before you get rollin’.
Anna Efetova/Getty Images
Is microneedling at home safe?
When you’re wounding the skin repeatedly, there’s always some risk involved. According to the Food and Drug Administration (FDA), potential side effects of microneedling include:
redness
burning
itching
irritation
bleeding
crusting
peeling
roughness
Less common side effects include:
hypo- or hyperpigmentation
swollen lymph nodes
infection
You can minimize risks by following proper sanitization practices and using a cosmetic-grade device. Though they’re readily available, so far, the FDA hasn’t approved dermarollers with needles longer than .3 mm (which is considered a medical device), for at-home use.
Other candidates who are prob not a good fit for microneedling include those who have:
Basically, if the skin is inflamed, sensitive, or has acne, take it slow.
How do I microneedle at home?
If you’re ready to get rolling, here’s how:
Disinfect the device in 70 percent isopropyl alcohol for 5–10 mins.
Cleanse your skin with a gentle cleanser and apply a swab of alcohol to sanitize the area.
Gently roll the device over the treatment area vertically or horizontally, until you’ve covered the entire area about 2–3 times. Take care to lift the roller after each swipe.
Thoroughly rinse your face with water and pat dry.
Disinfect the device again in rubbing alcohol for 5-10 mins.
Safety tips
Inspect the device for any damaged pieces before each use.
Replace your rollerregularly. With repeated use, the needles can erode and potentially harm the skin.
Start with .2mm devices and work your way up over time. Your skin will build tolerance while you get the hang of handling the device.
Avoid dermarolling rashes, acne, moles, etc.
Avoiding dermarolling too deeply into the skin in general – not only for the ouch factor, but also to protect your skin from scarring.
Avoid sensitive areas like under the eyes and brows. (But since we’re not your mom, if you *must* try to tackle those dark circles, use the shortest needle length and practice extra care. And know that going to a pro is still def advised instead!)
Avoid using harsh chemical serums before or after rolling. Save the salicylic acid, benzoyl peroxide, and retinoids for after your skin has healed from the needles.
Always load up on SPF the day after microneedling to prevent sun damage. You should apply it anyway, but it’s extra crucial when your skin is still tender.
Be sure to use a clean pillowcase and towels after rolling. In general, you wanna keep your hygiene 10/10 while your skin heals.
If you notice severe pain, redness, or irritation that persists for more than 2 hours, contact a doctor. You may have an infection that needs urgent care. 🚨
How often should I microneedle at home?
In general, experts recommend dermarolling about 3x/week for shorter needles (.2mm) and every 2-4 weeks for long ones (.2 mm+).
That’s because when you use longer needles, your skin naturally needs longer to heal. If you do it too often, you risk irritating, damaging, or scarring your skin.
Here’s the breakdown:
.2 mm: every other day
.5 mm: 1-3x/week
1 mm: 2x/month
1.5 mm: every 3-4 weeks
What dermaroller to use at home
You can find microneedling devices from .2 to 1.5 mm at outlets like:
Amazon
Ulta
Sephora
Target
Walmart
Devices over 1.5 mm are not recommended nor readily available for at-home use.
Pro tip: Not sure what needle size you need? Note your skin concerns. Fine lines can be rolled out with shorter needles, while deeper wrinkles may need at least 1 mm to see results.
Looking for support for hair growth or removal? These days, there are also specific devices like:
While intuitive and mindful eating seems synonymous, they each have their own vibe. Let’s delve into the distinctions and explore how to integrate both for a healthier approach to eating.
Brook Pifer/ Getty Images
What is mindful eating?
Mindful eating involves bringing your awareness to the present moment and being nonjudgmental within your body while eating.
This means paying full attention to your food and engaging all five senses. This can look like chewing more and doing it slowly, paying attention to the smell and different flavors coming from your plate, and truly savoring the experience by focusing on how your body feels while eating (in a way that is accepting, loving, and judgment-free).
Mindful eating also involves ditching distractions like TV or social media while eating.
While mindful eating is not an actual diet plan, it’s possible this technique may help someone manage their weight. Still, it’s more focused on enjoying a mind-body experience while eating and learning to cut out distractions to savor your food using all your senses.
What is intuitive eating?
Like mindful eating, intuitive eating is an intentional practice, not a diet. It’s all about cultivating a respectful relationship with your body by understanding its cues. If you’re hungry, eat. If you’re full, stop eating. The goal is to learn to tell the difference between when your body wants to eat emotionally and when it’s telling you it’s hungry.
Intuitive eating is also judgment-free eating. This technique wants you to cut out negativity when it comes to eating. That means no body-shaming or hella restrictive diets.
Intuitive eating can also involve finding new ways to honor your emotions instead of emotional eating.
How to combine intuitive eating and mindful eating
We love a good BOGO.
You can combine these techniques and basically base it on your mood.
For example, if you’re in a stressed-out space toward your body lately, practicing self-acceptance and feeding yourself when you’re physically hungry is intuitive in nature, and becoming present in the moment with that food (and your body) by engaging all your senses and leaving behind distractions is mindful. This can be done in one fell swoop!
Remember, the basic principles for both are judgment-free eating, self-acceptance, and taking care of your physical and mental health through your loving, self-respectful approach to eating.
Takeaway
Intuitive eating and mindful eating are sisters but not twins. You can learn to use them both in a way that’s unique to you.
How? Cultivate a healthy relationship with eating and with your body by honoring its needs, becoming present while eating, and throwing your phone in a river while you eat (just kidding. Kind of).
If you experience disordered eating, reach out for help right away via your trusted support system or your health care provider.
Read the full article here:
https://greatist.com/health/intuitive-eating-vs-mindful-eating
Who says skincare has to be as complicated as your last relationship status? Here’s the deal: a simple skincare routine suits most peeps and complexions. Forget the 10-step routines that feel like a part-time job. You can still look flawless without much effort.
Life’s too short, so strip it back to basics — cleanse, exfoliate, hydrate, treat, moisturize, and protect. That’s the skincare routine that can elevate your face game.
So, if you’re ready to give your skin what it craves but don’t have time to spare, continue reading to learn about a basic but brilliant skincare routine.
Step 1: Cleanse
Glowing skin starts with a clean slate. Just like you wouldn’t apply a fresh coat of paint over a dirty wall — a.k.a. the landlord’s special — don’t slap products on skin that hasn’t been thoroughly cleansed.
There’s a ton of different cleansers out there, so choose one tailored to your skin’s needs, for example:
Gel cleansers. They’re great for oily and combination skin types. They dive deep, cutting through grease to unclog pores while waving goodbye to excess oil and acne-causing bacteria.
Cream cleansers. Creamy, dreamy, and as gentle as a lo-fi beat. These are packed with moisturizing agents that hydrate and soothe dry or irritated skin.
Foam cleansers. Light, airy, and effective for combo skin. These cleansers remove dirt without overdrying the dry areas or underwhelming the oily zones.
Micellar water. Gentle and effective, micellar water attracts dirt and oil like a magnet and is suitable for most skin types.
Step 2: Exfoliate
Now it’s time to bring in the exfoliation squad to declutter your pores, allowing them to breathe easy, free from dead skin cells and grime.
You have a couple of options when it comes to exfoliation. Physical exfoliation involves using a brush, skin scrubber, or products with small particles, like coffee or sugar, to sweep away dead skin cells, making way for the new. But gently does it — think of it as petting a cat, not scrubbing a pot.
The other option is chemical exfoliants, such as AHAs (alpha hydroxy acids), BHAs (beta hydroxy acids), and fruit enzymes. These guys work by breaking down the glue that holds dead skin cells together. AHAs are good for surface-level exfoliation, while BHAs go deep into the pores, perfect for oily skin.
How often should you exfoliate? It depends on your skin type. Oily skin can usually handle more, while dry or sensitive skin might only need a once-a-week session. So, listen to your skin and experiment to see what works best for you.
Step 3: Hydrate
Hydration is absolutely essential. Here’s what you need to know to keep your skin from feeling like a dried-up sponge:
Hyaluronic acid. This moisture magnet draws water into the skin and holds it there, making everything plump and happy.
Glycerin. Another hydration hero. Glycerin locks in moisture, creating a protective barrier.
Aloe vera. Not just for sunburns, aloe vera is excellent for all-around soothing and hydrating.
Look for these ingredients in skincare products, like serums, hydrating mists, creams, and lotions.
Step 4: Treat
Pimples? No problem. Use a spot treatment to deliver targeted care and avoid collateral damage.
Salicylic acid. It goes deep into pores to break up the party, causing the breakout. It’s great for blackheads and whiteheads, making it a go-to for targeted pimple warfare.
Benzoyl peroxide. An on-the-spot treatment to kill acne-causing bacteria. It can be a bit drying, though, so use sparingly.
Tea tree oil. Prefer to keep it natural? Tea tree oil has antibacterial properties to help calm the storm without going full chemical.
Hydrocolloid patches. These are like mini vacuums for your zits, sucking out the gunk while protecting the area from bacteria (and prying fingers).
Step 5: Moisturize
It’s time to seal the deal with a moisturizer and keep all that good moisture locked in and protected from the harsh elements outside. Whether your skin is oily, dry, or somewhere in between, there’s a moisturizer out there that fits just right.
Dry skin. Cream-based moisturizers are your best friend.
Combination skin. Go with something hydrating but not too rich.
Look for drying ingredients like alcohol in high concentrations. They act like sandpaper, stripping away the moisture you worked so hard to lock in.
Step 6: Protect
Sunscreen is non-negotiable. Every. Single. Day. Think of it as the helmet for your bike ride or the life jacket for your swim. It protects against UV rays that can cause aging (UVA) and burning (UVB). Even if you’re inside, those rays can sneak through windows and wreak silent havoc.
Choose a broad-spectrum product to ensure you’re covered for UVA and UVB rays, and it should be SPF 30 or higher. And don’t forget to reapply, especially if you’re outside for extended periods.
Takeaway
A simple yet comprehensive skincare routine doesn’t need to take up more time than your coffee brewing in the morning.
Cleanse to clear the stage, exfoliate to get rid of deadbeat cells, hydrate to keep things smooth, treat any unwelcome guests, moisturize to lock it down, then protect with SPF and you’re done!
Read the full article here:
https://greatist.com/health/simple-skincare-routine
But sometimes, when poor habits rack up, your gut microbiome can get seriously out of whack. There’s no literal reboot button for your belly, but we have a three-day plan to keep your intestinal tract on track.
Peter Meade/Getty Images
What is a three day gut reset?
Don’t worry — we’re not suggesting you sip only lemon water for three days or down some nasty green gunk shake every several hours. A three-day gut reset is merely a way to refocus your attention on gut health for a few days, setting yourself on a positive path for the future. Think of it as a “hard refresh” for your mental and physical efforts for digestive wellness.
Let’s get started, shall we?
Day 1
Eat anti-inflammatory foods
Whether you have inflammatory bowel disease (IBD) or more short-lived gut inflammation, you may experience some seriously unpleasant digestive symptoms. One way to tame the flame: Consume more anti-inflammatory foods.
A 2022 study found that an anti-inflammatory diet helped reverse disorders of the intestinal flora (as well as reduce obesity). To craft your inflammation-busting meal plan, include plenty of richly colored fruits and vegetables, beans, legumes, whole grains, seafood, and healthy fats like avocado, olive oil, and nuts.
Stay hydrated
Water might be the forgotten “nutrient” for gut health. According to 2022 research, low-water drinkers had significant microbiota differences compared to high-water drinkers. Specifically, those who drank less H2O had higher concentrations of the harmful bacteria Campylobacter.
Fluids are also essential for keeping things moving in your gut. So drink up!
Get adequate sleep
Are better sleep and better digestive health linked? You bet your footie pajamas. Gut microbiome diversity is associated with healthy sleep — and sleep deprivation may lead to adverse changes in the ’biome.
Day 2
Add more high-fiber foods
Good gut bacteria have their very own favorite food: fiber. High-fiber items like beans, whole grains, vegetables, and fruits help beneficial thrive. On day two, make a meal plan that includes plenty of each.
Try regular exercise
When you get moving, so does your gut! Research shows that exercise modulates gut microbiota, enriching its diversity. So, consider what kind of movement you can reasonably include in your schedule (and what type you genuinely enjoy). Then, get started with a sweat session.
Day 3
Try fermented foods
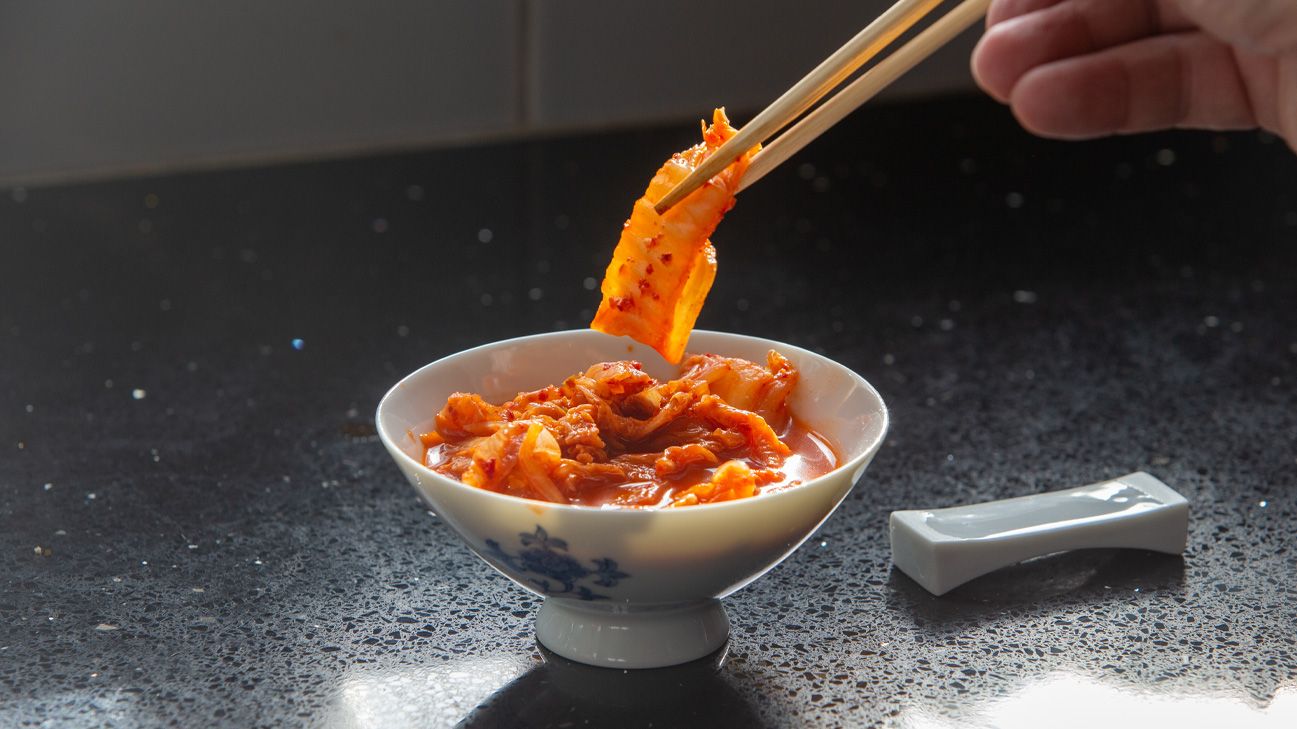
Fermented foods help increase the amount of helpful bacteria in the gut and reduce inflammatory proteins. So on day three, stock your fridge with fermented essentials like pickles, yogurt, kefir, sauerkraut, and kimchi.
Try relaxation techniques
At some point, we’ve all felt the connection between the belly and the brain. (Test day tummy ache, anyone?) Sometimes, the best approach to calming the gut is soothing the mind. Try downloading an app like Headspace or Calm that’ll prompt you to do a quick meditation or breathing practice daily.
Who should not try a gut reset?
Though a three-day gut reset can be a healthy, non-invasive process, it may not suit everyone. If you live with an inflammatory bowel condition, irritable bowel syndrome (IBS), or other gut health disorders, check with your doctor before diving in. Some of the steps in this plan (such as adding high-fiber or fermented foods) could aggravate your unique symptoms.
Takeaway
A three-day gut reset is a great option any time you feel like your gut could use a (gentle!) boot camp to get back in shape. Just be sure to avoid extreme measures and definitely talk to your doctor before making any significant changes to your diet.
Read the full article here:
https://greatist.com/health/how-to-reset-gut-health
Retinol didn’t face much competition until bakuchiol entered the chat. So, who’s this new girl in skin care, and can it really take on retinol in terms of effectiveness?
We chatted with a board-certified dermatologist for all the details to see if it’s really worth breaking up with reliable ol’ retinol.
Bakuchiol vs. retinol: Is bakuchiol better?
According to San Diego-based board-certified dermatologist Melanie Palm, retinol has a proven ability to increase cell turnover, reduce fine lines, and reduce signs of aging.
Though bakuchiol is naturally derived, Palm says it’s technically a newer skincare ingredient that hasn’t been as extensively studied yet.
Palm explains that bakuchiol has similar — but less powerful — effects to retinol when applied topically. Though it can help reduce the appearance of fine lines and wrinkles, it just can’t do it as intensively as retinol can.
“If you’re looking for an ingredient that packs more punch in terms of anti-aging, retinol would be your best bet,” she adds.
What is retinol?
Retinol is part of the retinoid family, a group of vitamin A derivatives. As Palm points out, it’s been around for decades and is clinically proven to help turn back the hands of time.
Retinol, the least intense member of the vitamin A group, is available over the counter almost everywhere.
So, if you were to pick up a prescription from your derm for a retinoid, it’d be spicier in terms of application and side effects, but it’s also likely it’d be more effective as well.
How to use retinol
Palm suggests applying your retinol after cleansing, toning, spot treating (if needed), and applying any serums. BTW, retinol is typically thought of as a nighttime product, though some don’t buy into this theory and use it during the day.
Whether you use it AM or PM, sunscreen is a must (seriously).
“Although you should be applying sunscreen daily, retinol does make your skin more photosensitive, so it’s important to be extra diligent about sunscreen use throughout the day,” Palm says.
Palm also points out that if you’re sensitive around the nose and mouth, apply less product around these areas.
Though it’s not as powerful for anti-aging as retinol, Palm says there are a few reasons why someone might opt for bakuchiol instead.
For example, those with sensitive skin who are more likely to experience redness and flaking from using retinol might consider bakuchiol as a non-irritating alternative.
“Additionally, because vitamin A is linked to birth defects, individuals who are pregnant, breastfeeding, or trying to conceive are advised against using retinol; this is where bakuchiol might come in as a pregnancy-safe alternative,” Palm adds.
How to use bakuchiol
According to Palm, bakuchiol is used the same way as retinol: after cleansing, toning, any spot treatment, or serums. You still need to use sunscreen during the day with bakuchiol use, by way (nice try!).
Palm adds that because of its exfoliating properties, she would avoid using bakuchiol with AHAs or BHAs for fear of overdoing it.
She also points out that it’s important to patch test ahead of applying any new product to your entire face to determine whether you’re allergic to it or not.
Side effects of bakuchiol
Palm says both retinol and bakuchiol can cause:
redness
dryness
sensitivity
FAQs
What are the downsides of bakuchiol?
Since bakuchiol has less powerful anti-aging effects than retinol, it’ll likely take longer to achieve noticeable results.
Is it OK to use bakuchiol every day?
Though bakuchiol is gentler than retinol, Palm reminds us that there is still a risk of redness, irritation, and redness, especially if you’re starting to use it in your skincare routine.
Can I use retinol and bakuchiol together?
Surprise: Yes, you can. Palm says she likes introducing bakuchiol first and then adding retinol later for her patients with sensitive skin.
PSA: Be sure you talk to a derm before making any major changes to your skincare routine.
Takeaway
For those who can tolerate retinol, have at it.
For those sensitive skin peeps, consider naturally derived bakuchiol, which is gentler but less effective for anti-aging results. You can also carefully combine the two!
Read the full article here:
https://greatist.com/health/bakuchiol-vs-retinol